Connect your own AI agent to manage your site
Let Claude, ChatGPT, Cursor, Codex or another AI tool edit your sites, using our MCP server or a WordPress application password.
Pick a way to connect
- MCP server (easiest): one connection for your whole account. Your AI can edit every V2 site, create new sites and run Mini Sites batches. No passwords per site.
- Application password: gives your AI access to one WordPress site. Use this for a site the MCP server can't reach, like an agency client site.
Connect with the MCP server
-
Add the connector In Claude or ChatGPT, add a custom connector with this URL, then sign in to 1ClickWebsite and click Allow.
https://www.1clickwebsite.ai/api/mcp -
Or use an API key For Claude Code, Cursor or Codex, create a key on the API Keys page and add the same URL with the key. For Claude Code:
claude mcp add --transport http 1clickwebsite https://www.1clickwebsite.ai/api/mcp --header "Authorization: Bearer YOUR_API_KEY" -
Ask for a change Name the site and say what you want, like "Change the phone number on Harbor Plumbing to (916) 555-0147." Every edit can be undone.
Good to know: setup for Cursor, Codex and other tools is in the MCP server docs. Anyone with your API key can edit your sites, so keep it private.
Connect with an application password
Your AI tool needs four things:
- Site URL: such as
https://example.com - WordPress username or email
- A WordPress application password: made in the steps below
- Our agent guide: 1clickwebsite.ai/ai-agent-guide
The guide link alone isn't enough. The tool also needs the URL, username and password for your site.
Create an application password
-
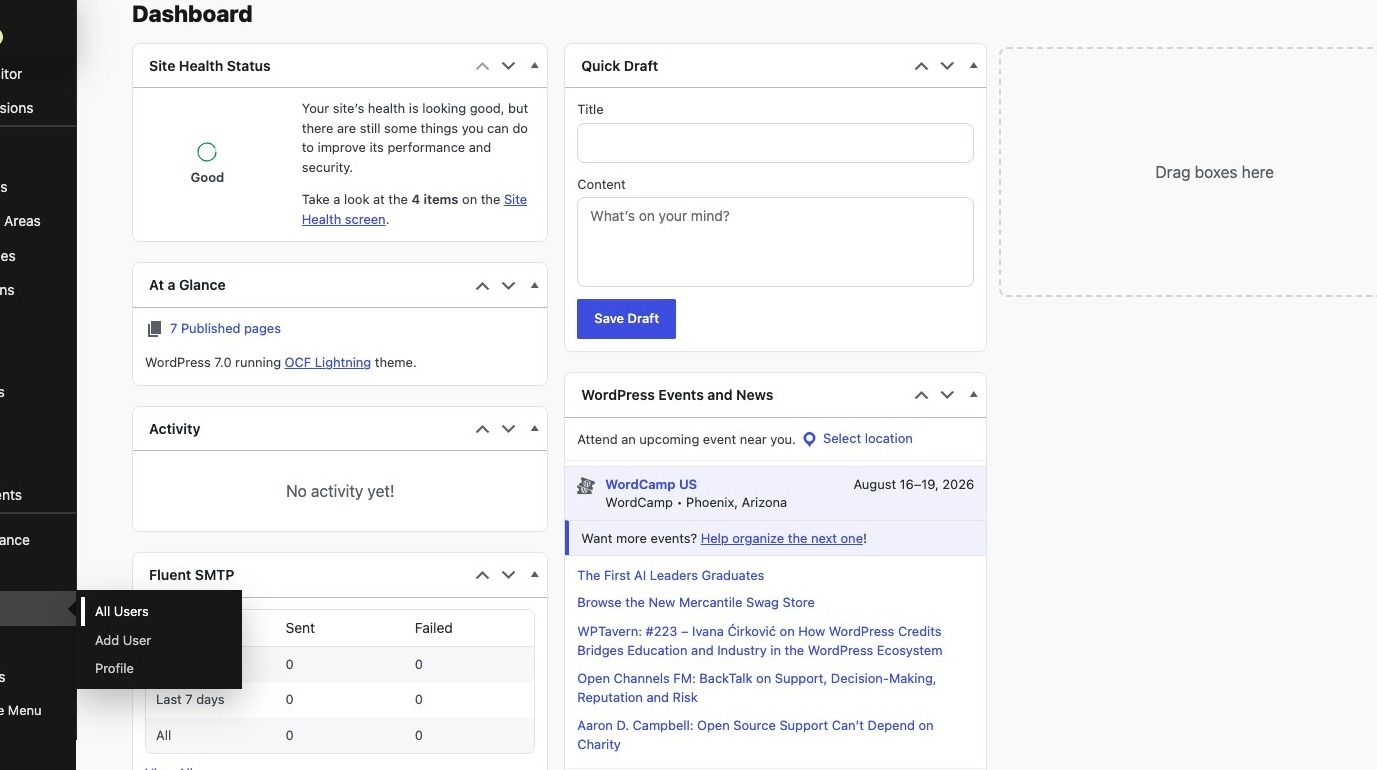
Open WordPress admin Log in to your site's WordPress dashboard.
-
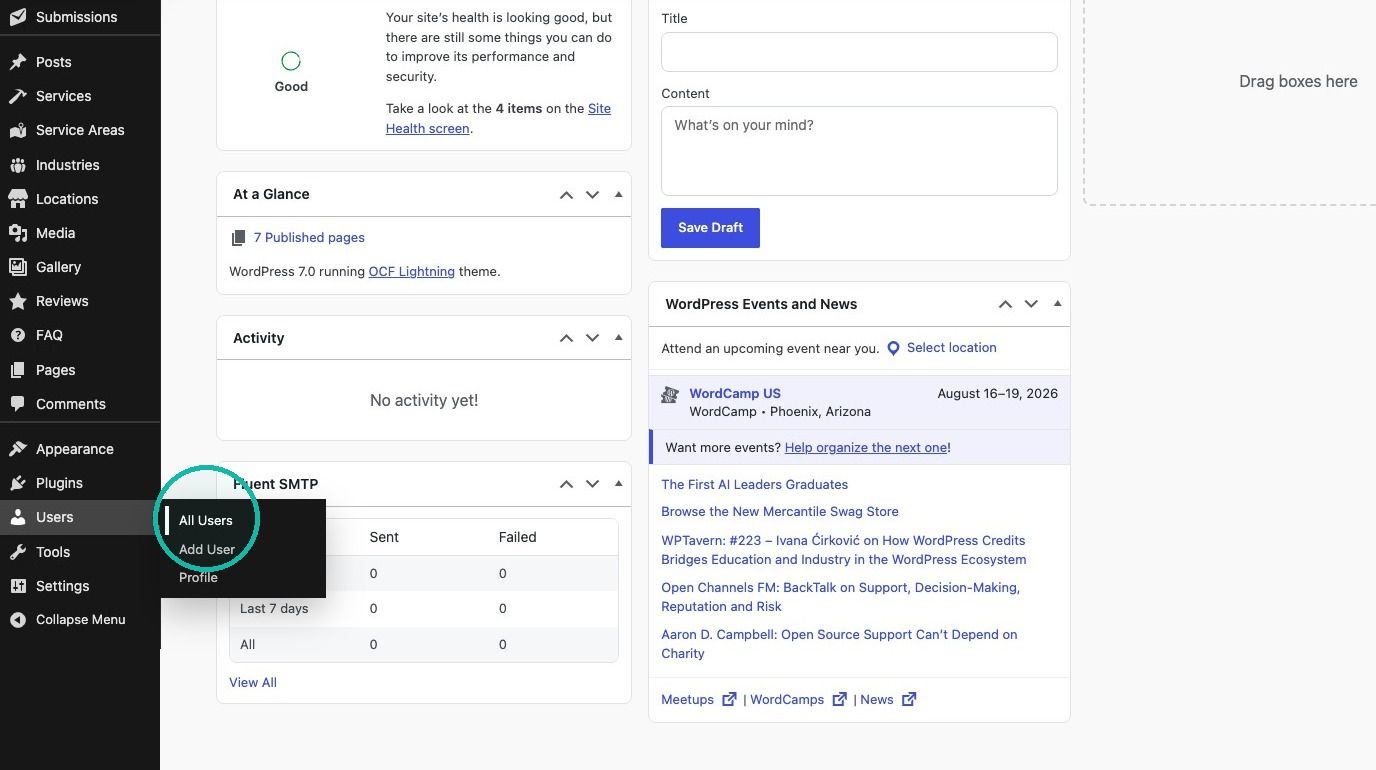
Open Users Go to Users > All Users.
-
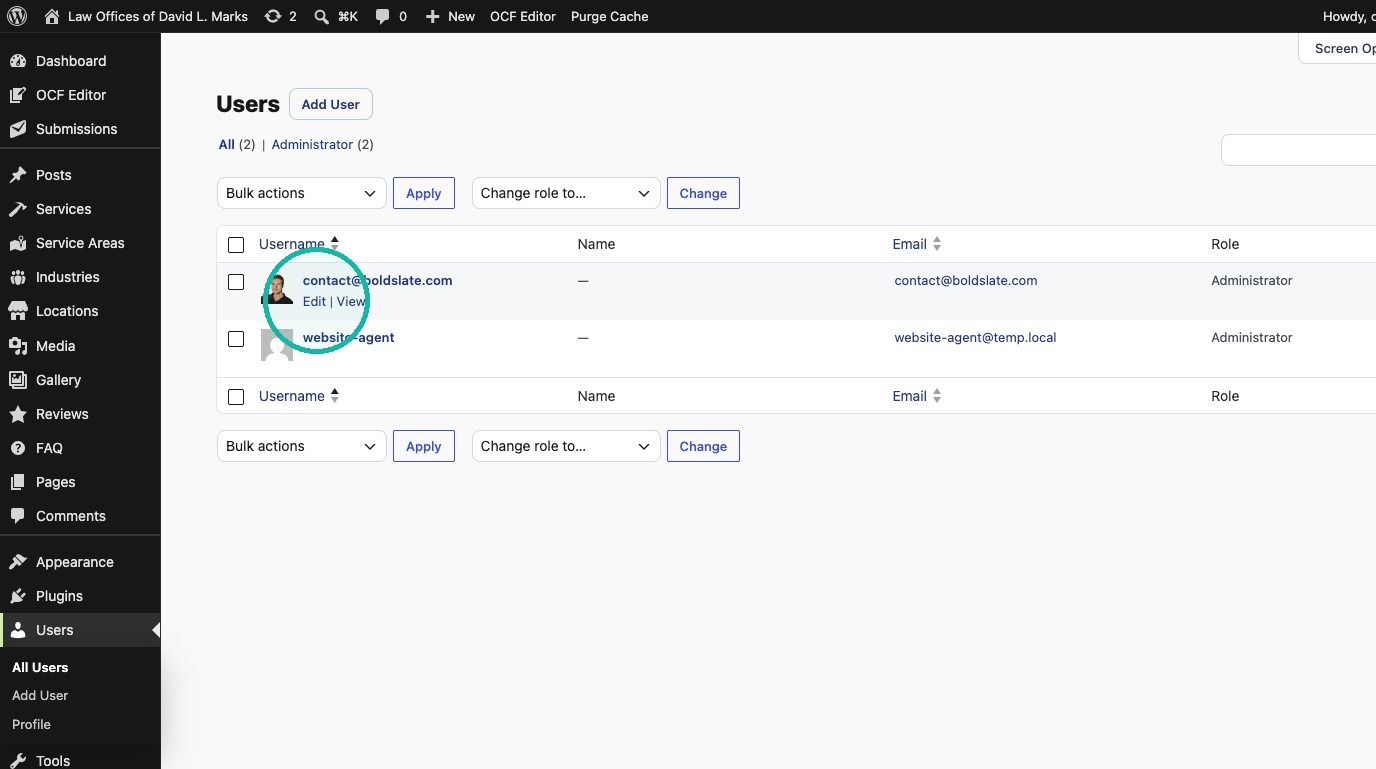
Edit your profile Hover over your user and click Edit.
-
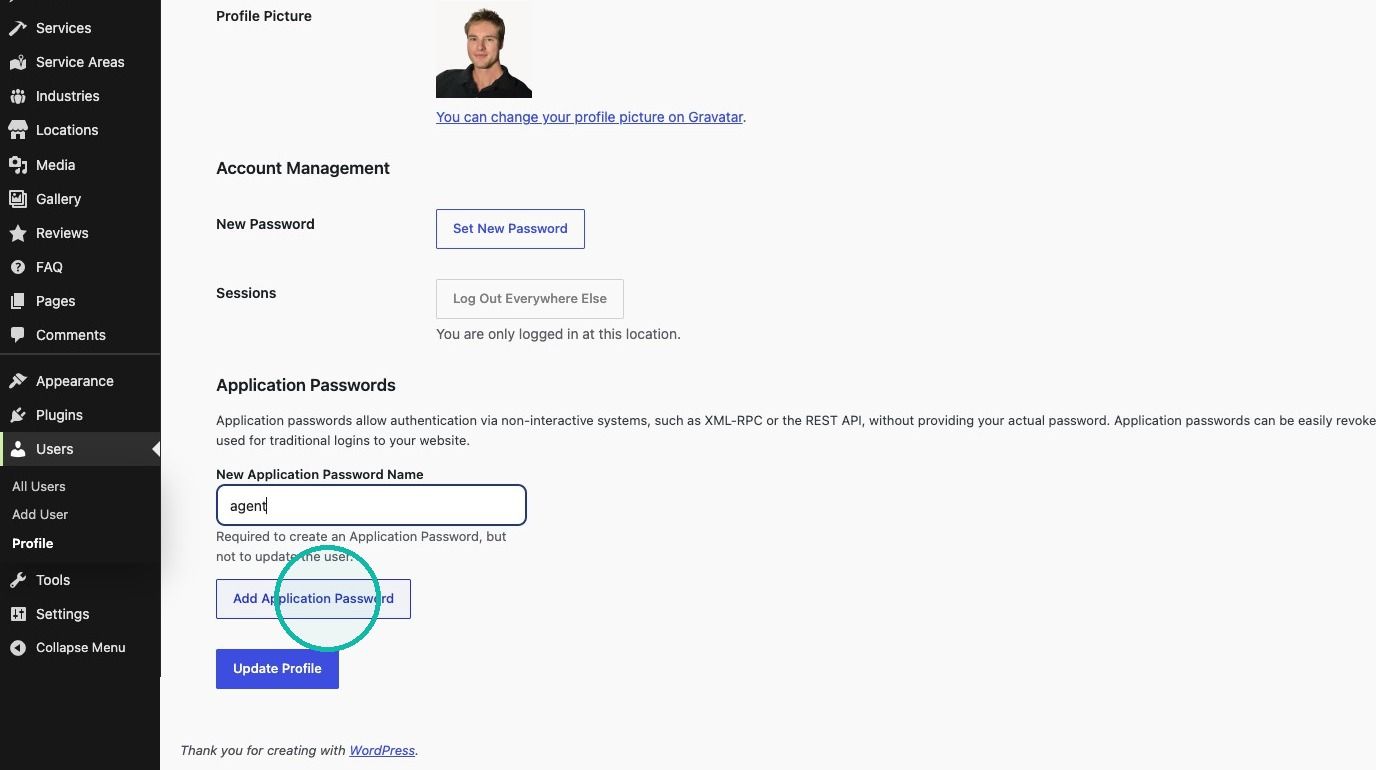
Name the password Scroll to New Application Password Name and enter a name like
Claude Codeso you can spot it later.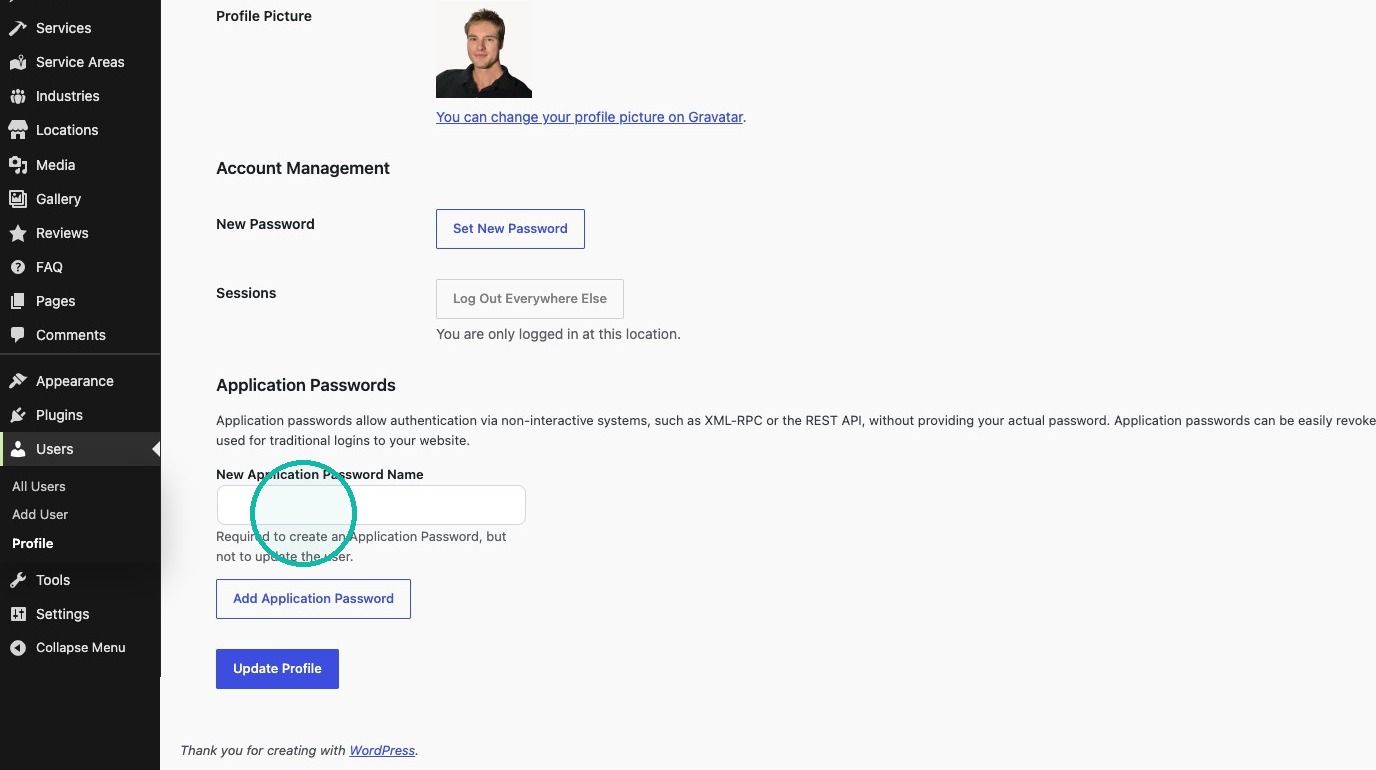
-
Create it Click Add Application Password.
-
Copy it Click Copy and keep it private. Spaces in the password are fine.
Give it to your AI tool
Send your tool a message like this:
Use this guide to manage my 1ClickWebsite site:
https://1clickwebsite.ai/ai-agent-guide

Site URL: https://example.com
WordPress username: your-email@example.com
WordPress application password: paste-the-application-password-here
The tool will use the guide to look at your site, make focused changes and check the result.
Keep it secure
For quick edits, paste the details when the tool asks. For a safer local setup, ask the tool to make an environment file you paste them into:
SITE_URL=https://example.com
WP_USERNAME=your-email@example.com
WP_APPLICATION_PASSWORD=paste-the-application-password-here
Good to know: an application password is separate from your normal login. You can revoke it anytime without changing your password. Never commit it to GitHub or share it in public files.
Remove access later
- Open your profile In WordPress, go to Users and open your profile.
- Revoke the password Scroll to Application Passwords, find the one you made, and click Revoke.
Troubleshooting
- Tool can't connect: double-check the site URL, username and application password.
- Still stuck: chat with us and include your site URL and the AI tool you're using.
Still stuck?
Chat with us and we'll reply right here, usually in a few minutes.